While working on an API today I realized the JMSSerializer does not support neither DateTimeInteface nor DateTimeImmutable. I am going to walk you through the necessary steps to serialize DateTimeImmutable objects using JMSSerializer.
Building an own handler requires not much code. The only problem is that documentation is scattered to many places and sometimes hard to find. I’m working on a full-stack Symfony 2.8 with JMSSerializerBundle installed. So make sure you are on the same page before starting.
That’s it. Now your DateTime and DateTimeImmutable objects should be serialized to string similar to 2016-09-28T12:54:07+00:00. If you encounter problems or have further questions find me on Twitter.
Good documentation is the key to utilize an API. But it is difficult to keep documentation and development of you API in sync. Differences between implementation and documentation are often hard to spot. Learn how you can use Swagger to document you API first and profit by testing your implementation against your documentation and vice versa. No duplication needed!
Swagger Logo
I recently started planning a new RESTful API for my company. After some initial discussion on the scope and which API endpoints are needed I set out to write the specification in Swagger 2.0. This provided for a good starting point to the further refinement discussion. It also proved very useful to exchange information with our frontend developers in charge of implementing the first API consumer.
Swagger Editor
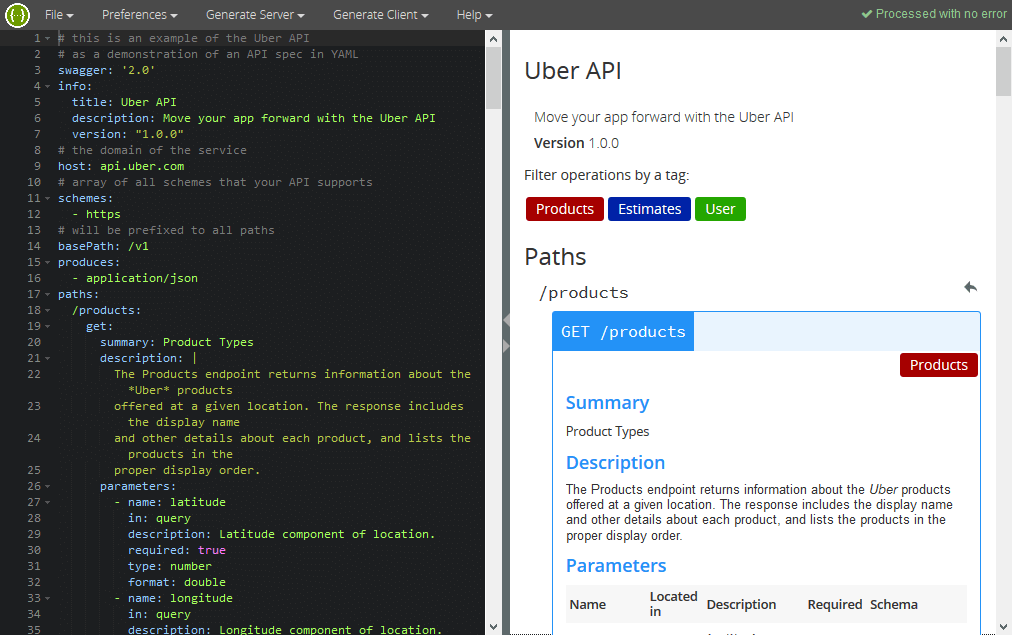
At first we started using Swagger Editor and YAML as format (because it is the lingua franca of Swagger Editor). Swagger Editor is a great tool to get started using Swagger. It runs directly in your browser, validates your YAML input and renders a beautiful interactive web interface. We were sending the swagger.yaml file around and I was maintaining the authoritative version of the file. This worked well for the start but it was obvious to us that we needed a tighter coupling to the application and track the file in sync with the implementation.
I had worked with NelmioApiDocBundle before to integrate Swagger with a Symfony application and it is a wonderful tool to document your existing API code. But as NelmioApiDocBundle generates the Swagger file from the annotated source code the source must exist prior to the documentation. This did not match our desired workflow. What’s more, the future of NelmioApiDocBundle seems to be a bit uncertain as the William Durand, the current maintainer, thinks of deprecating the bundle1.
I am thinking about slowly deprecating #NelmioApiDocBundle (feature-freeze first, then EOL). Thoughts?
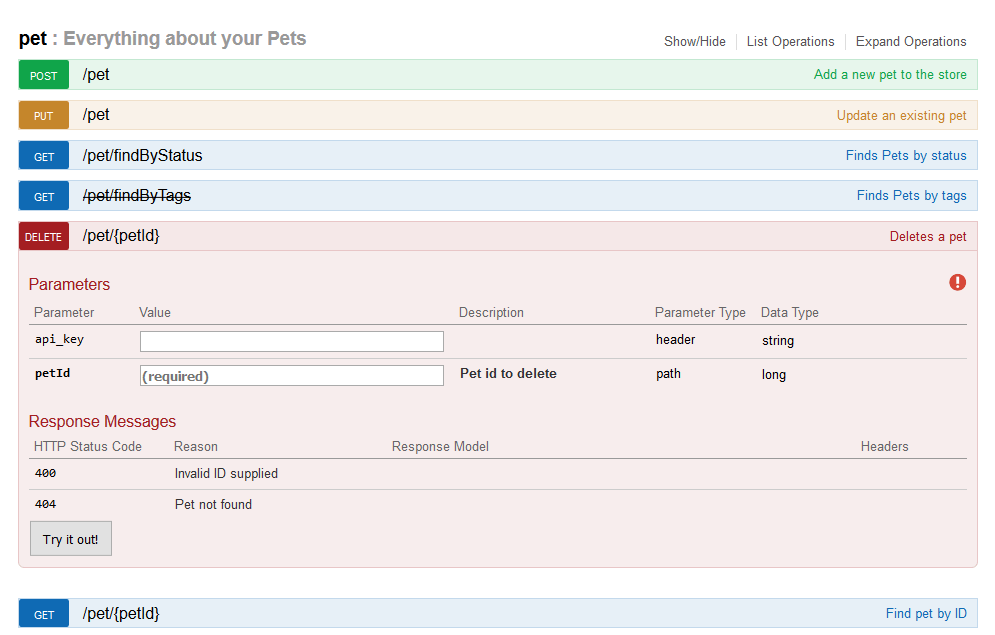
As I only needed a view component for my Swagger file and had no need for the annotation stuff SwaggerUIBundle was good enough for the job. That made it necessary to convert my Swagger file from YAML to JSON, but that’s no big deal as the Swagger Editor has an export option for JSON. For the Bundle configuration take a look at the installation instructions for static JSON files. This is what my routing configuration looked like:
As I started implementing the first endpoints I also created the first Test Cases in parallel with development. And because I am lazy, I did not want to repeat myself and write the same definitions I already had in my Swagger file for my test assertions again. So I was looking for a way to reuse my Swagger specification in my test’s assertion.
Swagger UI
The model definitions of Swagger 2.0 are valid JSON Schema which aims to be similar as XSD or DTD for XML. And fortunately there is already a library for PHPUnit JSON Schema Assertions. The only problem was I had a single huge Swagger file and I found no way to validate my API response only against a part of the big Swagger definition. JSON Schema allows splitting up the definition into multiple files and referencing these files using $ref. For more information about Referencing take a look at the OpenAPI Guidelines for Referencing, How to split a Swagger spec into smaller files and Structuring a complex schema.
After splitting up the file SwaggerUIBundle did not work anymore because it has problems handling and resolving the JSON references correctly. But that’s not a problem a of SwaggerUI, it’s only a problem of the bundle. As workaround I moved my Swagger files to src/AppBundle/Resources/public/swagger so that Symfony takes care of populating my files in the web root and I adjusted the SwaggerUIBundle configuration to just take that static entry point.
If your JSON Schema uses several nesting levels you might need to adjust the $maxDepth of the RefResover (the component that resolves your $ref).
JsonSchema\RefResolver::$maxDepth=10;
This got me what I want. Whenever there is a change either in the documentation or the implementation it will break the tests and the developer has to make sure both align. This ensures that the documentation is updated on code change and is maintained and also provides easy tests for new endpoints as a bonus!
If you are using NelmioApiDocBundle and looking for alternatives, read this insightful article by David Buchman who coverted his NemlioApiDocBundle annotations to swagger-php annotations. ↩